How to Attach Custom Embroidery Patches for Hats: 3 Effective Methods
author: orange
2025-06-18

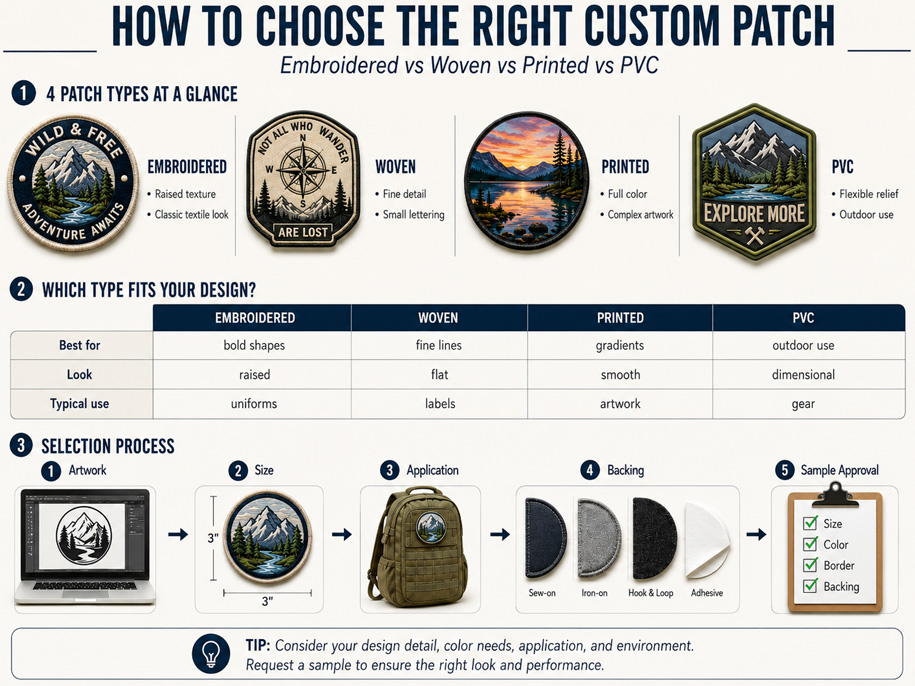
1.Heat - Adhesive Backed Patches: The Quick and Easy Way
Are you looking for a hassle - free method to decorate your hats with custom embroidery patches? The heat - adhesive backed patches are the perfect solution! This method is highly popular among hat enthusiasts and DIYers searching for “Easy Custom Embroidery Patches for Hats Attachment”.
Step - by - Step Guide
- Gather Your Supplies: You’ll need heat - adhesive backed embroidery patches, a clean hat, an iron, and an ironing board or a flat, hard - surface cloth. These keywords - rich items are essential for a successful attachment: “Heat - Adhesive Backed Embroidery Patches”, “Custom Hat Embroidery”.
- Position the Patch: Lay your hat flat on the ironing board. Place the embroidery patch precisely where you want it on the hat. Gently press it to mark the position, ensuring accuracy. This step is crucial for achieving a professional look when customizing your “Personalized Hat Embroidery”.
- Heat and Bond: Set your iron to a medium - heat setting to avoid damaging the hat material. Cover the patch with a thin cotton cloth to protect it from direct heat. Press the iron firmly and move it back and forth over the cloth for about 15 - 20 seconds. This process melts the adhesive, securely bonding the patch to the hat,
- Cool and Secure: After ironing, let the patch cool down naturally. Once cooled, carefully remove the cloth. If any edges seem loose, repeat the ironing process to ensure a strong hold for your “Long - Lasting Custom Hat Patches”.
2.Velcro Patches: The Flexible and Interchangeable Option
For those who love versatility and frequently search for “Removable Embroidery Patches for Hats”, the Velcro attachment method is ideal. It allows you to change up your hat’s look effortlessly.
Required Materials
You’ll need embroidery patches with Velcro backing, Velcro loop side patches (if not already on the hat), a clean hat, scissors, and optionally, a needle and thread. These items are key for creating “Customizable Hat Embroidery with Velcro”.
Hat Preparation
If your hat doesn’t have a Velcro loop side, cut the loop side patch to the appropriate size and position it on the hat. For a more permanent solution, sew the patch around the edges.
Patch Attachment
Align the Velcro hook side on the embroidery patch with the loop side on the hat. Press firmly to ensure a secure connection. When you want to change the patch or adjust its position, simply peel it off without damaging the hat, making it perfect for “Interchangeable Custom Hat Decorations”.
3.Sewn - on Patches: The Traditional and Durable Approach
For a long - lasting and classic look, sewn - on patches are the go - to choice, often searched under “Permanently Attached Embroidery Patches for Hats”.
Supplies Needed
Prepare your embroidery patch, a hat, sewing thread that matches the patch color, a needle, and scissors. These are essential for “Classic Custom Hat Embroidery with Sewing”.
Positioning and Pinning
Mark the patch’s position on the hat with a pencil. Place the patch on the marked area and secure it with straight pins around the edges to prevent it from shifting during sewing, as part of the “Precise Positioning for Sewn Hat Patches” process.
Sewing Process
Start sewing from one side of the patch using a running stitch (going in and out of the fabric). Keep the stitch length consistent, around 3 - 5mm, and sew closely together for a sturdy attachment. At corners, reduce the stitch length for a neat finish, following the techniques of “Professional - Looking Sewn Hat Embroidery”.
Finishing Touches
Once you’ve sewn all the way around, knot the thread on the back of the fabric and tuck the loose ends into the fabric layers. Trim any excess thread. Check the patch for any loose areas and reinforce them if necessary, ensuring your “Durable Sewn - on Custom Hat Patches” stay in place for a long time.
With these three methods - heat - adhesive, Velcro, and sewn - on - you can easily combine custom embroidery patches with your hats. Whether you prioritize speed, flexibility, or durability, there’s a perfect option for you to create unique “Personalized Hat Embroidery” that stands out from the crowd!
Green House Welcomes International Client for Woven Label Production Facility Tour – A Deep Exchange of Expertise and Culture
Elevate Your Brand and Style: The Endless Possibilities of Custom Embroidery Patches
Related Article

Explore when custom printed iron on patches, sublimation patches, and full color custom patches are better for photos, gradients, fine details, and smooth color transitions.
When Printing Works Better Than Thread

Improve patch performance by learning how to digitize logo for embroidery, select suitable patch backing, and optimize stitch density embroidery for clean, durable results.
Inside a Custom Embroidered Patch: What Determines Quality?